Blog

  • How to correctly store interleukin ELISA kits after aliquoting

    An interleukin ELISA kit is usually bought in a 96-well format but used a few wells at a time. That mismatch is where most kit performance is lost: the components have different tolerances to freezing, and treating them all the same way is what produces flat standard curves on the second or third use.

    Active protein components

    The standard, the detection antibody and the biotinylated antibody are the components that carry the assay. After aliquoting, seal them and store at −20 °C, protected from light, and never let them go through repeated freeze-thaw cycles. Take out one single-use portion at a time and use it completely once thawed — a partly used aliquot should not go back into the freezer.

    Label every aliquot with the component name, the date and, where relevant, the concentration. Once the original labels are gone, mixing up a detection antibody and a standard is easy and the mistake will not announce itself until the plate is already incubating.

    The microplate and unused strips

    Return the unused strips to the original foil pouch together with the desiccant, press the seal closed and store at −20 °C. In a humid climate, put the pouch inside a second sealed container — moisture reaching the coated wells is the usual cause of a coating that no longer binds, which reads as a uniformly low signal across the plate.

    Wash buffer and diluent

    The concentrated wash solution and the sample diluent are best kept sealed at 2–8 °C after aliquoting. If crystals form in the concentrate, warm it gently in a water bath and mix until they dissolve; that does not affect performance. Do not freeze them to save space.

    What must never go to −80 °C

    Do not push aliquoted reagents straight down to −80 °C. The formation of ice and the subsequent expansion can irreversibly damage protein structure, and the damage is silent — the reagent still looks normal and simply gives a weaker signal. Freezing to −20 °C and thawing on ice is the safer pattern.

    TMB substrate is a separate case. After aliquoting it must be kept in a sealed, opaque container at 2–8 °C and kept out of the light; exposure oxidises it and the colour change you see is not the one you are measuring.

    Use aliquots within one month

    Treat one month as the working limit for any aliquoted reagent. Beyond that, verify activity against a positive control before using it in an experiment, and only proceed if it passes. A kit that has been open for months can still produce a curve, which is exactly the problem — it may just be a lower curve than the one your standard is telling you to expect.

    A short aliquoting routine

    1. Equilibrate the kit to room temperature before opening anything.
    2. Reconstitute the standard as instructed, then aliquot it immediately into single-use volumes.
    3. Aliquot the detection and biotinylated antibodies and label each with component and date.
    4. Return the unused strips to the foil pouch with desiccant and reseal.
    5. Record the opening date on the kit box and note the one-month verification point.

    Note: The information on the scientific research products above is for reference only!

  • 200 uL Pipette Tips: Pouch vs Box Packaging and How to Choose

    Where the two formats differ in use

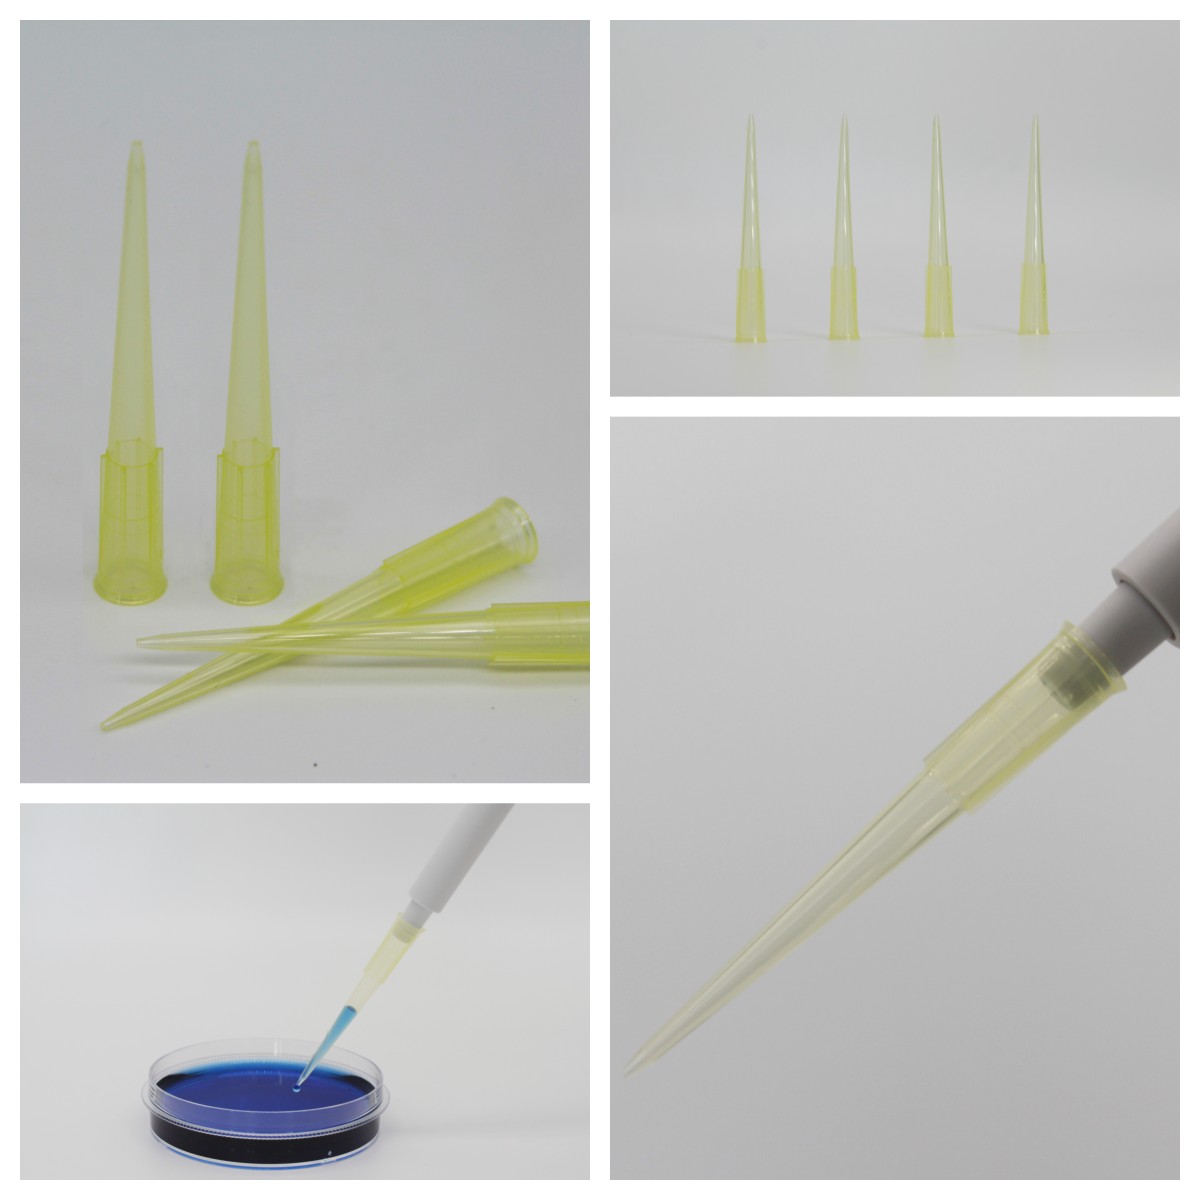
    The differences between the 200 μl pouch and boxed formats pipette tip lie primarily in three aspects: ease of use, cost, and sterile safety levels. They are suited to different experimental scenarios; there is no absolute superiority or inferiority between them, and the choice should simply be based on the specific requirements of the experiment.

    Pouch (bulk bag) packaging

    Packaging format: The standard specification is 1,000 sticks per bag, whilst the bulk packaging option can hold up to 25,000 sticks per bag. pipette tip No pre-packaged trays; all items are stored together in a sealed PE bag.

    Advantages: Extremely low cost per stick; suitable for high-throughput routine experiments involving a daily consumption of over a thousand sticks.

    Drawback: Before use, you must manually load pipette tip must be loaded individually into the pipette tip box before use, which is time-consuming and labour-intensive; moreover, external contamination is easily introduced during the packing process, and the sterile model requires additional high-pressure sterilized treatment.

    Suitable applications: Routine preparation of standard molecular biology reagents, bulk processing of specimen, teaching experiments, routine pipetting practice and other applications where sterile-grade requirements are not stringent but consumption is high.

    Differences in Applications and a Selection Guide for 200 μl Pouch and Box Packages pipette tip

    Racked, boxed tips

    Packaging format: 96 units per pre-packed tray; the standard specification is 10 trays per box. Upon dispatch, pipette tip are neatly arranged on standard ANSI/SBS-compliant pipette tip pallets, eliminating the need for manual packing into boxes.

    Advantages: Most models are shipped ready-to-use (sterile), with DNase/RNase-free certification; they can be used immediately upon opening, thereby avoiding the risk of contamination associated with manual packing, and are compatible with automated pipetting workstations for direct handling.

    Drawbacks: Higher overall purchase cost; the total capacity per box is significantly lower than that of the bulk-packaged versions; and restocking is required more frequently in high-use scenarios.

    Suitable applications: qPCR, gene sequencing, cell culture, low-abundance nucleic acid extraction and other precision experiments requiring sterile-grade standards, as well as scenarios requiring standardised pre-loaded plates, such as automated workstations and high-throughput drug screening.

    How to choose

    Selection CriteriaPackaged in 200 μl sachets pipette tipBoxed, 200 μl pipette tip
    sterile SafeguardsHigh voltage must be applied manually sterilized; this may introduce contaminationPre-treated at the factory sterilized, free from DNase and RNase, with an extremely low risk of contamination
    Operational efficiencyThis requires manual packing, which is time-consuming and labour-intensiveReady to use straight out of the box; compatible with automated equipment; highly efficient
    Suitable scenariosPreparation of standard reagents, crude specimen processing, teaching experimentsqPCR, cell culture, sequencing and automated workstation experiments
    Single-pack capacity1,000–25,000 units per bag; low restocking frequency960 sticks per box; frequent restocking is required for high-frequency use

    Common mistakes when ordering

    If a laboratory’s average daily consumption of pipette tip exceeds 500 units, and its work primarily involves routine preliminary processing, the bulk-packaged option should be prioritised, as this can significantly reduce the cost of purchasing consumables.

    For precision experiments involving precious specimen and trace analysis, bagged pipette tip that has not been sterilized must under no circumstances be used; it is essential to procure factory-sealed sterilized, to avoid experimental results being invalidated by external nucleic acid contamination.

    When used with an automated pipetting workstation, it is essential to use standard ANSI/SBS-compliant pipette tip boxes; pipette tip bags are not directly compatible with the equipment trays and may result in pipetting misalignment, needle jams and other faults.


    Note: The information on the scientific research products above is for reference only!

  • BUNSEN: Common Issues and Precautions in ELISA Experiments

    Most ELISA failures are not mysterious. They cluster around a small number of stages, and each symptom points at a specific cause. This guide works through the symptoms you are most likely to see, then the preparation steps that prevent most of them from happening at all.

    No colour, or a very faint standard curve

    If the standard curve itself will not develop, the problem is in the reagents rather than the samples. The usual causes are incomplete reconstitution of the standard — pipetting alone does not dissolve it, it needs vortexing — or a missed component such as the detection antibody or the enzyme conjugate, which leaves antigen and antibody unable to bind and produce colour at all.

    Standard curve develops, but samples show no signal

    Here the assay chemistry is working and the samples are the issue. Either the target concentration sits well below the kit’s limit of detection, or something in the matrix is interfering — strong surfactants are a common culprit, because they disrupt the specific antigen–antibody interaction without producing any visible sign.

    Blank OD above 0.1: background that masks the signal

    A blank well reading above roughly 0.1 OD means the substrate has over-developed. In practice this comes from leaving the reaction running too long — the stop solution goes in after the positive control has already turned clearly coloured, by which point non-specific binding has accumulated across the plate. Stop on colour, not on the clock.

    The wells look right but the reader says otherwise

    When the colour looks normal by eye and the OD is low, check the instrument settings first. For TMB the measurement wavelength must be 450 nm with a reference at 650 nm. A wrong wavelength, or a reference filter left off, distorts every value on the plate.

    Well-to-well CV above 15 %

    Replicate CV is a pipetting and temperature question before it is anything else. Uncalibrated pipettes, inconsistent dispensing technique and volume differences between wells all show up directly as CV. So does temperature drift during incubation: if one side of the plate warms faster than the other, the reactions progress at different rates and no amount of averaging will fix it.

    Outer wells darker than the centre

    This is the classic edge effect, and it is almost always evaporation. If the plate seal is not airtight, liquid evaporates from the perimeter wells, the reaction mixture concentrates locally and the outer wells develop more strongly. Sealing properly and incubating in a humid chamber removes most of it.

    Different dilutions of the same sample disagree

    When a dilution series gives concentrations that do not track, suspect the hook effect. At high antigen concentrations, excess antigen saturates both the capture and the detection antibody so that the sandwich cannot form efficiently — OD falls instead of rising, and the sample reads as a false negative. Dilute further and the values converge.

    Background rose after washing

    If background is high despite washing, check the wash buffer itself. Tween-20 below 0.05 % leaves non-specific protein bound to the wells, and fewer than three wash cycles does the same. Washing is a step people shorten under time pressure, and it is the cheapest step to get right.

    Before the plate: preparation that prevents most of this

    • Take all reagents out of 2–8 °C and let them equilibrate to 20–25 °C for 20–30 minutes. Cold reagents bind unevenly.
    • In a cold room in winter, equilibrate in a 37 °C incubator instead — but do not let the plate itself sit at 37 °C while you set up.
    • Aliquot the standard and freeze the aliquots. Repeated freeze-thaw of the standard is one of the most common causes of a curve that drifts between plates.
    • If crystals have formed in the wash concentrate, dissolve them completely in a 37 °C water bath and mix before diluting.
    • Calibrate the pipettes, and for multichannel work check each channel individually — one lazy channel is enough to break a row.

    Coating and blocking

    Coat with pH 9.6 carbonate buffer, and set the concentration from a pilot experiment: too high raises non-specific background, too low gives an insufficient signal. Coating overnight at 4 °C for 12–16 hours generally gives more stable binding and lower background than a shorter incubation at 37 °C.

    Remove excess liquid immediately after coating and add blocking solution straight away. Wells left to dry at this stage block unevenly, and the resulting plate looks perfectly normal until the results come out scattered.

    Adding samples and incubating

    • Hold the tip vertically in the air and dispense without touching the well wall or the bottom — contact dislodges the coated layer.
    • Change tips between every sample.
    • Incubate in a humid chamber, with damp filter paper in the base, and keep it sealed at 37 °C throughout.
    • Do not extend the incubation time “to be safe”. Longer incubation increases non-specific binding and raises background directly.

    Washing

    Fill each well to the brim, let it soak for about 30 seconds, then blot. Repeat at least three to five times. After the final wash, invert the plate on absorbent paper and tap firmly to clear residual liquid — leftover wash buffer dilutes the substrate and flattens the curve.

    Colour development, stopping and reading

    • Prepare TMB immediately before use and keep it out of the light; it oxidises on its own if you leave it standing.
    • Stop as soon as a clear blue gradient appears in the high-concentration standard wells.
    • Add the stop solution in the same order and at the same rate as the substrate, so that every well stops at the same moment.
    • Read within 15 minutes of stopping. The coloured product fades, and the OD you record later is simply lower than the true value.
    • Wipe the underside of the plate before reading — fingerprints and water marks read as absorbance.
    • Use dual-wavelength reading (450 nm measurement, 650 nm reference) to remove plate and plastic background.

    Note: The information on the scientific research products above is for reference only!

  • BUNSEN: How should cryovials be thawed?

    Cell cryopreservation only works if the freeze is slow and the thaw is fast. Most viability is lost on the thaw side, and almost all of the safety incidents with cryovials happen in the same two minutes. This is the procedure we recommend, together with the storage rules that prevent the tubes from failing in the first place.

    Before you take the vial out of the tank

    • Wear a lab coat and cryogenic gloves, and use safety glasses or a face shield — the risk here is liquid nitrogen burns and vial rupture, not just contamination.
    • Warm culture medium to 37 °C in advance.
    • Have 70 % ethanol, sterile centrifuge tubes, pipettes and a prepared culture vessel inside the laminar flow cabinet before you start, so the vial is not sitting on the bench while you look for them.

    The three-second pause

    Lift the vial out of the liquid nitrogen and let it stand in air for three to five seconds. Any liquid nitrogen that seeped into the thread or the tube body evaporates in that window. Skip this and the vial can rupture the moment it meets warm water, which is both a sample loss and a real injury risk.

    Thaw fast, in a 37 °C bath

    Place the vial in a 37 °C water bath and swirl continuously. It should be almost completely liquid in one to two minutes. Remove it while a small ice crystal is still visible — that crystal is your margin. Slow thawing lets ice recrystallise inside the cells, and that is what destroys viability, not the warming itself.

    Keep the water level below the cap. Water that reaches the thread wicks into the vial, and a contaminated thaw is worse than a slow one.

    Thawing a cryovial in a 37 °C water bath

    Transfer under sterile conditions

    Wipe the outside of the vial with 70 % ethanol, move it into the cabinet, and unscrew the cap slowly — pressure can send droplets out. Transfer the suspension into a tube containing a small volume of pre-warmed medium, added gently rather than in one pour, so the cells do not experience an osmotic shock.

    Dealing with the cryoprotectant

    What you do next depends on the DMSO concentration and on how sensitive the line is:

    • Around 5 % DMSO — centrifugation is usually unnecessary; dilute with medium (15 mL is a typical volume) and plate directly.
    • 10 % DMSO, or a DMSO-sensitive line — pellet at 125–500 g for 5–10 minutes, discard the supernatant, and resuspend the pellet gently in 1–2 mL of fresh pre-warmed medium.

    Resuspend by pipetting slowly against the wall of the tube. Vigorous pipetting at this stage damages exactly the cells you just went to the trouble of recovering.

    The first twelve hours decide the recovery

    Plate into a pre-equilibrated vessel and incubate at 37 °C with 5 % CO₂. Then leave it alone. Do not move, tilt or check the flask during the first 12 hours — attachment is under way and disturbance at this stage shows up as patchy, uneven monolayers a day later.

    Storage rules that prevent tube failure

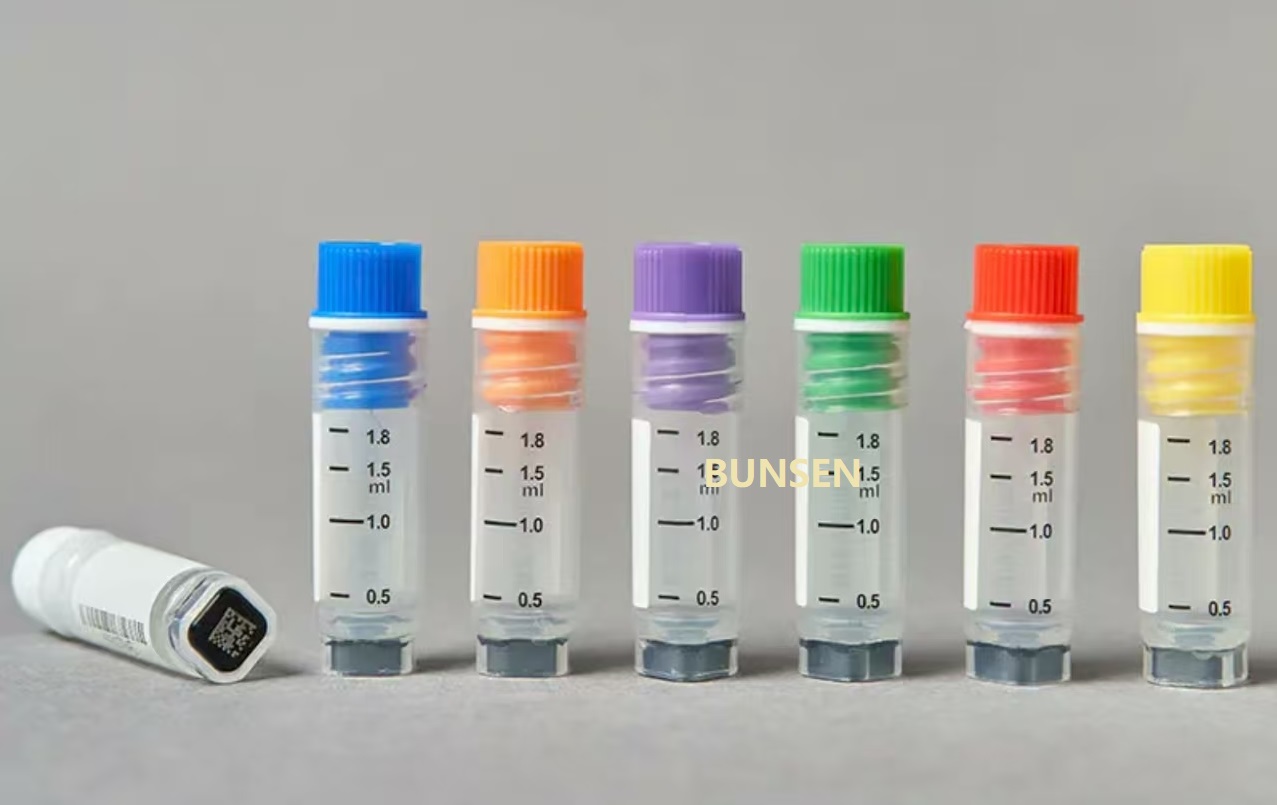
    • Vapour phase only. Store in the vapour phase of liquid nitrogen, or at −80 °C. Never immerse vials in the liquid phase: nitrogen seeps in through the thread and expands on thawing.
    • Respect the working volume. Never fill beyond the rated volume on the tube, or an ice plug forms during freezing and the internal pressure can crack the vial.
    • Use externally threaded or skirted tubes for anything going into liquid nitrogen, and check that the tube is rated for the temperature before you rely on it.
    • Label before freezing, with the line, passage number and date. A vial recovered from a frosty box with an unreadable label is effectively lost.

    Note: The information on the scientific research products above is for reference only!

  • FAQ: What should you bear in mind when you receive serum?

    Serum is one of the most expensive reagents on the shelf and one of the easiest to ruin on the day it arrives. What you do in the first hour after delivery — checking the cold chain, deciding whether a partially thawed bottle is still usable, and splitting the bottle into single-use aliquots — determines whether the rest of the lot performs the way the certificate says it will.

    Check the packaging before you sign

    Inspect the outer carton and the bottle immediately. You are looking for leaks, cracked bottles, a broken cap seal and any sign that the bottle has been lying on its side. If the packaging is damaged, photograph it before you open anything and contact the supplier the same day — after-sales support depends on being able to see the condition at arrival.

    Read the cold chain record, not just the box

    Serum ships on dry ice, so what matters is whether there was enough dry ice for the whole journey and whether the bottle ever fully thawed. A small amount of residual dry ice on arrival is a good sign. An empty compartment with a bottle at room temperature is not, and it should be reported rather than quietly put in the freezer.

    If it arrived partially thawed

    Partial melting during transit is common and is usually not a reason to reject the lot. Let the bottle thaw completely at 2–8 °C, mix gently by swirling — never by shaking, which foams the protein and denatures it — then refreeze at −20 °C. The key point is that the serum should be thawed and refrozen as a whole bottle once, not repeatedly.

    If the bottle is warm to the touch and has clearly been at room temperature for an extended period, treat it as a quality complaint instead. Serum left warm turns cloudy and loses active protein, and no amount of subsequent freezing reverses that.

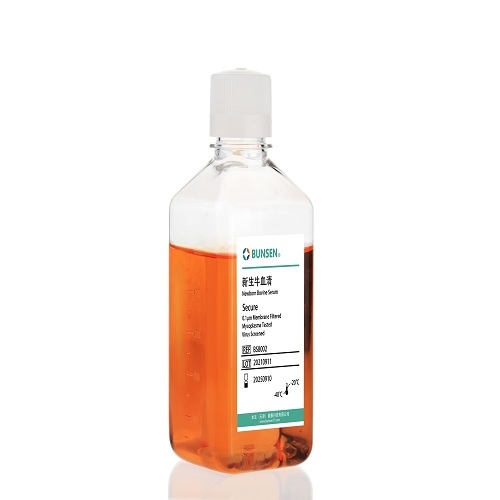
    Serum bottle inspection on arrival

    Storing it once it is cold

    • −5 °C to −20 °C is the working storage range for serum. Move it there as soon as it is checked in.
    • 4 °C storage should not exceed one month, and is best limited to the bottle you are currently using.
    • Leave headspace. Serum expands by roughly 10 % when frozen; an overfilled bottle cracks, and a cracked bottle is a contaminated bottle.
    • Do not store long term at −80 °C. The risk of the bottle cracking goes up, and the large temperature gradient on thawing precipitates a noticeable amount of protein.
    • Never leave it at 37 °C for convenience. It clouds the serum and damages the proteins you are paying for.

    Aliquot on day one, not on the day you need it

    Split the bottle into single-use portions — around 50 mL is a common size — under sterile conditions, and label each with the lot number, the date and the concentration. From then on, take one aliquot and thaw only that. Every freeze-thaw cycle a bottle goes through costs you a little activity, and the loss is cumulative and invisible until an experiment fails.

    Mistakes that show up months later

    • Thawing the whole bottle for a 10 mL experiment and refreezing the rest.
    • Storing serum next to the freezer door, where the temperature cycles every time someone opens it.
    • Assuming a cloudy bottle is contaminated when it is actually heat-damaged — the two look similar but only one is fixable by filtration.
    • Using the last of one lot and the first of the next without a side-by-side control, which makes any change in cell behaviour impossible to attribute.

    Serum products referenced in this article

    Product codeSerum type
    BS8002Newborn calf serum
    BS800820Premium fetal bovine serum
    BS800821Superior fetal bovine serum

    Note: The information on the scientific research products above is for reference only!

  • PET, PETG and HDPE Reagent Bottles: Which One for Which Job

    PET, PETG and HDPE look similar on a shelf and are priced within a few percent of each other, but they fail in completely different ways. Picking the wrong one rarely shows up on day one — it shows up as a cracked bottle after autoclaving, a culture that turns cloudy on day three, or a solvent that quietly softens the wall over a month.

    Quick answer: match the plastic to the job

    If you need…ChooseBecause
    Gas barrier for cell culture, stackable storagePETThe square PET bottle gives the best gas barrier of the three
    To see the contents and autoclave themPETGClear, tolerates short 121 °C cycles, pH 2–11
    Weak acids, alcohols, volatile reagents, squeezingHDPEChemically inert and flexible; survives a drop

    PET — the square media bottle

    The square profile is not cosmetic. It packs more volume into the same shelf space — around 30 % more than round bottles of equivalent height — and it presents an identical footprint to a gripper on an automated line, so a robotic arm does not need to re-learn the bottle every time the supplier changes.

    What it does well: gas barrier, USP Class VI compliance, compatibility with bioreactor aeration systems, and sizes from 50 mL to 1,000 mL. It is the default choice for routine reagent aliquoting, cell resuscitation, seeding and pilot-scale medium storage.

    Where it stops: strong organic solvents, anything above about 70 °C, and indefinite reuse — repeated long-term reuse raises the risk of additive migration. The corners are also the weak point in transit, so shock protection matters more than it does on a round bottle.

    PETG — when you need to see through it

    PETG trades some barrier performance for clarity: light transmission above 90 %, so you can look at a flask on a shelf and see whether the medium is contaminated without opening it. It tolerates pH 2–11 and short 121 °C sterilisation cycles, and gamma-sterilised versions are available DNAse/RNAse-free.

    The 45° bevelled pouring edge is a small detail that saves time: liquid leaves the bottle as a stream rather than running down the outside, which measurably reduces losses on small volumes.

    Typical uses are cell culture, trypsin/EDTA and similar biological reagents, and industrial medium preparation. Watch two things: check the cap seal before autoclaving, because a deformed cap will leak under pressure, and never overfill — the headspace is there for gas exchange, not wasted space.

    HDPE — the chemical workhorse

    High-density polyethylene is the one you reach for when the contents are chemically awkward. It resists most weak acids, weak alkalis and alcohols, tolerates temperatures up to about 110 °C, and comes in capacities from 30 mL to 1,000 mL with coloured caps for reagent identification.

    It is also the right answer for volatility. HDPE is slightly flexible, so the cap seats better and the cap/thread interface holds vapour in; narrow-neck versions are the standard packaging for small-volume volatile reagent aliquots and kit components.

    Where it stops: it is not a long-term container for highly polar organic solvents, and prolonged food-grade use is not what it was designed for. Inspect periodically for stress cracks, crazing or leaks — HDPE fails slowly and then suddenly, and the first sign is usually a damp shelf.

    Where all three run out

    None of these is a long-term solvent bottle. If the contents are dichloromethane, acetone or concentrated acid, the correct answer is glass or a fluoropolymer, not a better grade of polyolefin. Equally, none should be reused indefinitely for cell work: scratches harbour contamination and the plastic itself ages.

    The sterilisation route also constrains the choice. Gamma irradiation suits PET and PETG; autoclaving at 121 °C suits PETG and PP but not standard PET; HDPE tolerates steam but deforms more easily than PP over repeated cycles.

    Three questions that decide it

    1. Will it go in an autoclave? Then PETG, not PET.
    2. Do you need to see inside without opening? Then PETG.
    3. Is the contents a solvent, an alcohol or something volatile? Then HDPE.

    If none of those apply — cell culture medium, stored for weeks, moved by robot — the answer is square PET, and the stackability is what you are really buying.


    Note: The information on the scientific research products above is for reference only!

  • Tabletop Centrifuge 300-5000 rpm, 6 x 15 mL

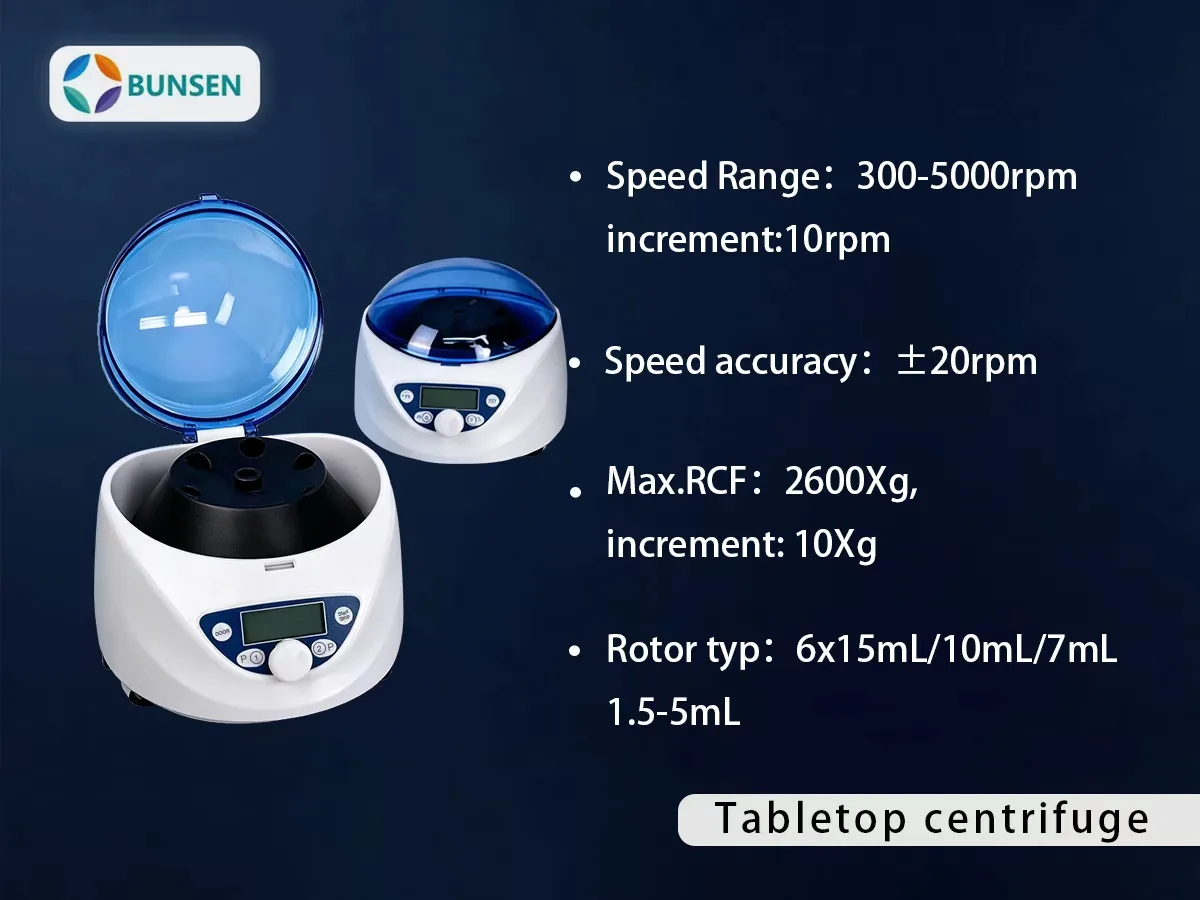
    BUNSEN has added a benchtop instrument to its life-science range: a low-speed tabletop centrifuge built for routine serum, plasma, urine and fecal sample separation in clinical, biochemical and research laboratories.

    BUNSEN tabletop centrifuge, 300-5000 rpm, 6 x 15 mL rotor, LCD display

    Specifications

    ParameterSpecification
    Speed range300–5000 rpm, increment 10 rpm
    Speed accuracy±20 rpm
    Max. RCF2600 ×g, increment 10 ×g
    Rotor capacity6 × 15 mL / 10 mL / 7 mL; 1.5–5 mL
    Run time30 sec – 99 min, HD (continuous running)
    DisplayLCD, with sound alert
    Preset programsP1 / P2, one-key start
    Acceleration / deceleration1 acceleration / 2 deceleration settings
    Safety devicesDoor interlock, overspeed detector, automatic internal diagnosis
    MotorBrushless DC motor, maintenance-free
    Power requirementsSingle-phase 100–240 V, 50 / 60 Hz, 70 W
    Dimensions (W × D × H)300 × 240 × 180 mm
    Net weight5.2 kg
    Optional adapters5 mL adapter for 13 × 75 mm blood collection tubes; 1.5 / 2 mL cryovial and centrifuge tube adapter

    What makes it practical day to day

    • Speed and RCF can both be set and read out — switch between rpm and ×g at the touch of a key.
    • Two preset programs (P1 / P2) cover the two separations a clinical bench repeats most, so routine runs start with one key.
    • Two deceleration settings let you choose between a faster stop and a gentler one for fragile samples.
    • Automatic lid-lock release after the run — no waiting to pull the lid open.
    • Door interlock, overspeed detection and automatic internal diagnosis come as standard.
    • At 300 × 240 × 180 mm and 5.2 kg it fits a bench corner, and the brushless DC motor needs no maintenance.

    Where it fits in your workflow

    The 6 × 15 mL rotor takes 15 / 10 / 7 mL tubes and 1.5–5 mL microtubes directly. For blood collection, the optional 5 mL adapter accepts 13 × 75 mm tubes; a second adapter takes 1.5 / 2 mL cryovials and centrifuge tubes. That covers serum and plasma preparation, urine and fecal sample processing, and the routine spin steps before PCR, ELISA or clinical chemistry — which means the centrifuge pairs with the consumables BUNSEN already supplies, including centrifuge tubes, microcentrifuge tubes and cryovials.

    Typical users: clinical and biochemistry laboratories, blood banks, medical colleges, and medical research institutes.


    Note: The information on the scientific research products above is for reference only!

  • Pipette Tip Types Explained: A Buyer’s Classification Guide

    The range of domestic plastic pipettes compiled by BUNSEN BUNSEN pipette tip can be clearly categorised according to three main criteria: specification and range, functional characteristics and packaging format, covering the requirements of the vast majority of laboratory pipetting scenarios.

    By volume range

    This is the most basic classification method; domestic pipette tip main flow ranges cover all scenarios:

    10 μL: Available in two variants—0.5–10 μL white short tips and 0.5–10 μL white long tips—suitable for microvolume pipetting.

    20 μL: 0.5–20 μL white pipettes with long tips, suitable for dispensing small volumes.

    100 μL: Available in 10–100 μL sizes, suitable for routine experiments involving medium-sized samples.

    200 μL: 20–200 μL yellow pipette tips are one of the standard sizes used in laboratories in China.

    1000 μL: 100–1000 μL blue pipette tips; some brands offer an extended 1250 μL version, suitable for dispensing from deep vessels.

    5,000 μL: A high-capacity model with a range of 1,000–5,000 μL, designed for dispensing large volumes of liquid.

    BUNSEN Introducing Domestic Plastics pipette tip Classification Guide

    By function: filtered, low-retention, wide-orifice

    The functional pipette tip, designed to meet specific experimental requirements, represents the core focus of the upgrade programme for the domestically produced pipette tip:

    Featuring filter pipette tip: An integrated hydrophobic polypropylene filter cartridge prevents aerosols from entering the interior of pipette, thereby avoiding cross-contamination of samples; suitable for high-precision experiments such as PCR and nucleic acid extraction.

    low-binding pipette tip ‌: The inner walls have been treated using a special process, which significantly reduces the surface residue of viscous liquids such as nucleic acid and protein; the volume of precious samples residue can be as low as ≤0.5 per cent, thereby minimising reagent wastage.

    sterile DNase/RNase-free pipette tip ‌: Treated with irradiation sterilized, free from RNase, DNase, DNA, ATP and pyrogen contamination; a full test certificate is provided, making it suitable for high-demand applications such as molecular diagnostics.

    Special-purpose pipette tip ‌: Includes sub-categories such as gel loading for electrophoresis pipette tip, wide-mouth pipettes pipette tip for transferring macromolecular solutions, and specialised pipettes pipette tip compatible with external pistons pipette.

    By packaging: racked, bagged, individually wrapped

    The packaging of the domestically produced pipette tip is tailored to the usage habits of domestic users and is mainly divided into three categories:

    Bagged pipette tip ‌: The most common format on the domestic market, packaged in plastic self-sealing bags containing 500–1,000 units per bag, with prices ranging from 20 to 60 yuan. These offer good value for money and are suitable for routine experiments not involving a high risk of contamination.

    Boxed pipette tip ‌: pipette tip are pre-arranged neatly in pipette tip boxes, eliminating the need for manual packing, cleanliness offers greater assurance; the price is 1.5–2.5 times that of bagged products, and it is suitable for high-standard scenarios such as sterile and DNase/RNase-free.

    Refill pack pipette tip: Multiple sheets of pipette tip stacked in a tower shape can be loaded directly into an empty pipette tip box, making them 10–20 per cent cheaper than boxed pipette tip and significantly reducing the use of plastic packaging materials.


    Note: The information on the scientific research products above is for reference only!

  • New Product Launch: Roche Analyser Cup & Tray Set

    We have added two consumables to the range for labs running Roche chemiluminescence and immunochemistry analysers: a reaction cup set and a matching pipette tip. Both are moulded in pharmaceutical-grade polypropylene in a GMP production area, and both are certified DNA-free, RNAse-free and pyrogen-free.

    Reaction cups — BS-RH-A26

    BUNSEN BS-RH-A26 reaction cups compatible with Roche analysers
    PropertySpecification
    Product codeBS-RH-A26
    Packing60 cups per box
    MaterialPharmaceutical-grade polypropylene
    Compatible instrumentsRoche E411 / E401, E501, E601, E701, E801 chemiluminescence analysers
    PurityDNA-free, RNase-free, pyrogen-free
    ProductionGMP production area, ISO 13485 quality management

    Typical applications are blood testing, DNA extraction, and enzyme-linked serological and biochemical assays.

    Pipette tips — BS-RH-A29

    BUNSEN BS-RH-A29 pipette tips compatible with Roche analysers
    PropertySpecification
    Product codeBS-RH-A29
    Packing120 tips per box
    MaterialPharmaceutical-grade polypropylene
    Compatible instrumentsRoche E411 / E401, E501, E601, E701 immunochemiluminescence analysers
    PurityDNA-free, RNase-free, pyrogen-free
    ProductionGMP production area, ISO 13485 quality management

    The same applications apply: blood testing, DNA extraction, and serological and biochemical assays.

    Why the material and the cleanroom matter here

    On an automated analyser the reaction cup is not just a container — it is part of the optical path. A cup with inconsistent wall thickness or a visible flow line will scatter light, and the analyser has no way to tell you that the variation came from the plastic rather than from the sample. That is why we control the moulding in a GMP area rather than buying cups in and repacking them.

    Pyrogen control matters for a different reason. Endotoxins survive autoclaving, so a sterile cup is not automatically an endotoxin-free cup. For IVD workflows the certificate of analysis should state the endotoxin result, the sterility result and the irradiation dose, batch by batch.

    Who these are for

    Labs and distributors running Roche E-series analysers who want a second source for single-use consumables without changing their instrument protocol. Both items are supplied boxed and ready to load, and evaluation samples can be requested before a volume order.


    Note: The information on the scientific research products above is for reference only!

    Related BUNSEN products

    BUNSEN manufactures these consumables in-house.

    Browse the full product range, or request a sample or quote.

  • Standard vs Low-Binding 8-Strip PCR Tubes: What Changes

    Two 8-strip tubes can look identical and behave differently, because the difference sits on the inside of the tube. A standard strip is moulded from plain polypropylene; a low-binding strip has its inner surface modified so that proteins, nucleic acids and enzymes have far less to stick to.

    That single change decides which one belongs in your protocol.

    The difference is the inner surface

    Untreated polypropylene binds biomolecules non-specifically. In a standard strip, a fraction of the protein, nucleic acid or enzyme in the reaction adsorbs to the wall instead of staying in solution. It is invisible, it scales with surface area, and it hurts most when there is very little material to begin with.

    A low-binding strip is surface-modified to suppress that adsorption. The result is that nearly all of the reaction liquid takes part in the reaction rather than a fraction of it sitting on the wall after the spin.

    What that changes in practice

    Standard 8-stripLow-binding 8-strip
    Inner surfacePlain polypropylene, no treatmentModified to suppress non-specific binding
    Residue after emptyingHigher; noticeable loss when recovering trace amountsVery low; nearly all the liquid can be recovered
    Effect on the assayAcceptable where some loss is toleratedLess fluorescence signal loss; better sensitivity and reproducibility
    Quality controlDNase-free, RNase-free, sterileDNase-free, RNase-free, pyrogen-free, plus adsorption testing for batch consistency
    CostLowerHigher

    Which one belongs in your protocol

    Standard strips are the right default for routine PCR and standard amplification, where the reaction contains enough material that a small adsorptive loss does not change the answer, and where cost per strip matters across a high volume of runs.

    Low-binding strips earn their price where recovery is the measurement: qPCR, micro-volume protein assays, and recovery of low-abundance nucleic acids. The same property that improves recovery also reduces fluorescence signal loss, which is why sensitivity and reproducibility both improve rather than one at the expense of the other.

    The extra quality control matters as much as the surface itself. Low-binding strips are tested for adsorption performance in addition to being DNase-free, RNase-free and pyrogen-free, so the behaviour is consistent from batch to batch — which is what makes a qPCR result comparable across months of work.

    Available catalogue numbers

    Catalogue no.Description
    BS-PCR-01D0.1 mL clear PCR tube, single tube
    BS-PCR-02D0.2 mL clear PCR tube, single tube
    BS-PCR-081-C0.1 mL clear PCR 8-strip tube (including optical flat cap)
    BS-PCR-081-M0.1 mL milky-white PCR 8-strip tube (with lid)
    BS-PCR-082-C0.2 mL clear PCR 8-strip tube (including optical flat cap)
    BS-PCR-082-M0.2 mL milky-white PCR 8-strip tube (with lid)
    BS-PCR-0102-CM0.1 mL / 0.2 mL PCR 8-well strip cap, optical flat cap, clear
    BS-PCR-02T-LG0.2 mL transparent PCR 8-strip tube with cap

    Frequently asked questions

    Is low-binding worth it for standard PCR?

    Usually not. If the reaction has enough template and the result is a band, adsorption loss does not change the outcome, and standard strips cost less.

    Does low-binding change the plastic itself?

    The base material is still polypropylene; what changes is the inner surface treatment, which is what suppresses non-specific binding.

    Can I mix standard and low-binding strips in one run?

    Mechanically yes, but do not compare the results as if the wells were equivalent. If you are measuring recovery or a low signal, keep one tube type across the whole comparison.


    Note: The information on the scientific research products above is for reference only!